Thursday, March 29, 2012

Strawberry Pop

What to do with those strawberries after they have gone mushy, but not rotten? 

This is your answer... AND It is soooo easy!  
At my old job (as nanny) I made some of these simply delicious strawberry pops for the kids!

 These are some amazing fruit pops that you would spend 5 dollars on at the store and it was sooo easy and is 150% better than the sugar pops you can get at the store... give it a try, it is worth it!
  
These are 100% fresh, tasty, NO sugar aka:Healthy and oh so easy. 
It only took me 5 mins! 

Directions:
Just take off the stems, wash your berries, add 1 tbs.water per 5 or 6 strawberries and blend, pour your puree into ice cube trays or Popsicle trays.
Add sticks for holding, and freeze.


"To Cook or Not to Cook"

I am using a few posts from my old blog since my camera is out of service for a few...
This is an entry I have from last year on my old blog. :P I changed the info a bit to fit what I am doing now... Enjoy!

I had the urge to cook today. (Maybe it is because I had time
And we just went shopping yesterday for groceries?)
I debated on what to do with my extra time and it came down to nap or cook. Otherwise expressed, "To cook, or not to cook!" haha but I'll leave out the drama.
I bought some ricotta cheese yesterday so there was one particular food on the brain, ZITI!
To my surprise, I did not have to debate long what to do with my time.
It was a perfect rainy day to cook!
So I got ambitious and made some baked Ziti.
I was intimidated by the stuffing part of the process but it was really simple. 
I enjoyed making ziti and chad was glad I did too!

It has only a few simple ingredients which include:
Ziti Pasta, Mozzarella Cheese, Ricotta Cheese, Parmesan Cheese, Parsley, and Your Favorite Sauce.
Mix together your cheeses and parsley and stuff them into your cooked Ziti Pasta,
Drizzle red sauce over them and bake for 35 mins at 350 degrees.
 
SOOO Delicious!
This is how it turned out:


While I waited for the Ziti to bake I put dinner in the crock pot. 
I bought a turkey roast yesterday and couldn't wait to eat it.
mmm... All I added was a little broth, carrots, broccoli, celery, onion, and red potato as well as herbs and spices. This smells delicious and I know it will taste great with a side of couscous. 
I can't wait for dinner... although I am still full from those rich Ziti!
Thankfully crock pot cooking takes a while and after smelling all the herbs and spices blend so gracefully for HOURS makes you HUNGRY!

  
This is a picture of My dinner in the crock pot! MMM... 5 hours on Low will make a perfectly juicy turkey and vegetable roast. 
Hope your day is as delicious as mine!
If you want any recipes for anything I post just leave me a comment.

Haven't gotten the urge to bake yet, but look out for pictures from that event too! Ha
Thanks for reading, hope it was inspiring.
Blessings.
Written by Janelle

Thursday, March 22, 2012

Unclog your Drain without Barfing!

Tips and Tricks Thursday: 
I thought since being a house wife isn't always as glamorous as baking cinnamon bread and making people's tummy happy... although I would love if that is all it entailed! Sometimes there are dirty jobs around the house. Once a week I am hoping to give you a fun tip that I have learned to clean up and keep that house a home!
This week we are talking about the drains...
(yes I started with one of the worst! sorry)

The bathroom is one of my least favorite places to clean! GROSS... I wish I had a cleaning lady for just that room! (oook and maybe the laundry...) Being that I have long hair, our shower drain has the inevitable quarterly clog. 
It is bad... as soon as you start to notice the water not draining as fast as it used to you are in trouble. I like to try and catch it early.. but those snakes for the drain are so foul! I hate pulling the glob of disgusting-mess out of the drain! (Chad won't do it... "its your hair"-Chad and I guess I don't blame him!) 

There are a few tips for avoiding this:
 
I use drain-o once every other month and it seems to keep the clog away. I also brush my hair in the shower so that my comb catches most of the loose hairs that would otherwise go down the drain, this slows the process for a clogged drain but doesn't stop it! TMI I know... 
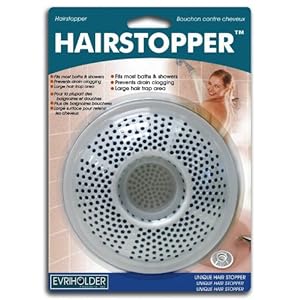
Hair Stopper - Drain Protector / Strainer
Image from amazon.
Also-
Getting a vent: one of those  Drain cover things help in the bathroom... but that still means cleaning up hair. Unfortunately My drain is not the kind with a big hole like the ones used with these:


 TIPS AND TRICKS:

Unfortunately we can do lots to try and avoid this altogether but it is typical to have to deal with the clogged drain in the kitchen, the toilet an the shower/tub... 
 
 Thankfully there are some tricks to unclogging the drain when precautions just don't cut it and its stopped up!

1st: Flushing 
Remove as much of the water that’s backed up in the sink/tub as you can. Toss 1 cup of baking soda into the drain then pour a large pot or kettle of boiling hot water over top. If the sink/tub empties completely, pour another kettle of boiling water to give it another clean flush and then let cool water run from the faucet for a couple minutes.

2nd: Vinegar Flush 
This tried and true method really works!
 Remove as much water as you can. Toss 1 cup of baking soda down the drain, then pour down a cup of household vinegar, plug with the sink stopper then let sit for half an hour.
 After about 30 minutes, unplug the sink and pour a kettle full of hot water on top. This truly works and I have found that is even works with water still in the sink, just add double the baking soda and vinegar and allow extra time for it to work. Once the water in the sink has fully emptied, flush with fresh batches of boiling water 2 or 3 times to completely clear out the gunk.  
I like to follow it up with some bleach as well so that vinegar smell is not there any longer.


3rd: Plunger! 

We must not forget there is the trusty Plunger!

Use a sink plunger to try forcing the drain to clear. You’ll need a few inches of water in the sink to help make a vacuum seal for the plunger and a few forceful plunges to make this work. You can buy a sink plunger that’s about a 1/3 of the size of a regular toilet plunger. These are only a couple bucks, need very little room and they’re great to keep under the kitchen sink just in case. you can use a full sized sink or toilet plunger if you can’t find a small sink plunger. (just sanitize!)

I use this for the Sink when I get a clog there as well as the toilet (of course never for myself, I am not willing to admit that haha) and the shower.. this works wonders but must be done carefully.. lets not cause hernias

I learned recently that you can put petroleum jelly around the rim on the plunger and it will add suction and help with plunging when submerging into water.

I tried it when I got sweet potato skins stuck in my sink and had to plunge the sink twice (on both sides) as it made its way through the pipes! 
*don't put sweet potato skins down the sink.. you think they will get shredded in the disposal but they don't, BIG MESS!!

4th: The Snake
These are gross, and seriously smelly sometimes! 
make sure to be careful and to always wear gloves... we aren't savages here, lets keep some dignity!
IF snaking from the top of drain is not working you can always take it apart and open and remove the trap or (clean-out plug) underneath the sink to try clearing the clogged mass. Use a plumber’s snake or a wire coat hanger to poke into the drain and break apart the clog. You’ll need an empty bucket on hand to catch all the water as well as eye goggles firmly in place. This is messy and must be done smart, don't hold me accountable if you make it worse than when you started!

5th: Commercial Drain Cleaners
 The drain-o, plumber clearer... and products alike are always helpful. just be careful if using chemical commercial drain cleaners, wear eye goggles since the water can splash back up at you. If you’ve used a commercial cleaner and it didn’t clear out the clog, call a plumber. You don’t want to add anything to the backed up water that might react badly to the chemicals in the cleaner. Also don’t try removing the drain trap since the chemical water can splash into your eyes and face. A professional is better equipped to handle this situation.


6th:Plumber
If all else fails just call the plumber already! 
there is no shame in that! 

Hopefully this is helpful!
Remember to always check the drain in your tub to make sure it is open before freaking out! And be careful when unclogging pipes... 
have a happy Thursday!
Blessings,
Janelle

Monday, March 19, 2012

Aromatherapy Home Recipe


 This will make your home smell wonderful!
I found this online and had to try it out. 
This is an organic and cheap way to make your home smell like William-Sonoma! 
I don't know about you but I love going to that store... of course to just look (wayy to expensive)and they always have that fresh and sweet smell in the air. Well this reminds me of that wonderful scent. 


Start with a cup of water
1 lemon
a few sprigs of rosemary 
and a tsp of vanilla

add those to your pot and let simmer.
make sure to squeeze your lemon a bit to release a little more citrus smell. 

I set a timer for 30 minutes and every thirty minutes I added more water and reset the timer. This was sooo easy and dirt cheap. I had a few lemons going bad, vanilla and rosemary on hand and it was as simple as throwing it all together and turning on the burner! 

This was a great smell that filled the whole house. I do this often now and hope you enjoy it too!

You can really get creative with this. I have heard many people use different variations of this at home.
Just lemon is great, Cinnamon, lemon, rosemary, oranges, lavendar, sage or thyme are all great scents that are easily available. Mix and match to find what scent you like best. 

Have fun, and tell me about your favorite scent!
Blessings,
Janelle


Tuesday, March 6, 2012

Aunt Karen's Famous Bread Recipe

I have been spoiled with a great family. My dad's sister (My aunt) Is the Martha Stewart of the family and she makes the BEST bread.. 
thankfully she shares the recipe so I can make it too!
And I am eager to share it with you so you can all enjoy it...

Chad came Home to some delicious smells this week. 
I have actually made 5 loaves over the past weekend.
I love to give them to people... easy gift!

 Ingredients:
1 1/8 cup warm water (between 110-120 degrees)
2 tbs honey
2 1/2 tsp yeast
2 tbs olive oil
1 tsp salt
3 cup flour

 Proof the yeast in warm water and honey until foamy and smelly (about 5 minutes) 
In your mixer with bread hook add salt and olive oil. 
Once yeast is proofed slowly add flour and water to mixer till ball is formed in mixer on the hook. 
Remove from hook, and let rise covered for 1 hour or until it has doubled in size.
Shape and cover for another hour to let rise again. 
Bake at 400 degrees for 15-20 minutes
let cook for a bit so it doesn't stick together when sliced, and enjoy! 

I thought I'd put the whole recipe together at the beginning so that you cannot make the mistake of missing a step in my tutorial. 
This way you can copy and paste it to print much easier as well...

Alright lets get started:
Get your water nice and warm. I use a candy thermometer to make sure the water is at 110-120 degrees. 
Before you add your yeast add your honey and stir it in to the water to proof the yeast. 
make sure to warm up your honey so that it will not make your water cold if you have your honey in the fridge.
after honey and water are mixed and the water is nice and yellow add your 2 1/2 tsp yeast and let sit for a while till foamy and really smelly... make sure to get a good yeast, don't skimp on that, it makes the world of a difference! 

 When its nice and bubbly its good to go and can be put into your mixer
 make sure to add your salt and olive oil and then alternate flour and yeast
 you will get a great dough ball... don't beat this dough, keep your mixer at a low speed.
 remove the hook and shape a bit into a ball.. let this sit and rise.
Be sure to cover and set a timer...

Once it has risen for an hour it will be twice the size and nice and airy...

 I always pour it out into my hand by tilting it so that it falls out of bowl and doesn't break all the great rise that it has taken an hour to make... don't over handle it but shape it delicately.
Put onto a well floured pan that you will put into the oven.
 Once you have shaped it to your liking...
I like to add slits in the dough by poking a line out with a knife.. don't try to slice it like bread, it will stick to your knife so simply poke it with the knife in a line...
add some garlic salt and some basil even some grated Parmesan cheese and let this rise for an hour. 
 Bake at 400 degrees for 15-20 minutes. At about the 10 minute mark turn the bread to get an even browning.
It will come out nice and golden brown with beautiful markings with a thin crust and some delicious soft center that is sweet!

If thicker crust is desired let bake a bit longer (make sure to watch the bread so it does not burn!)
 serve with salted butter or
 some balsamic vinegar and olive oil with some fresh garlic and roasted almonds!

Happy baking!
Share your pics of finished bread... I'd love to see em!
Blessings,
Janelle Dutcher


Friday, March 2, 2012

Chia Seed Milk Tea

OK so I have been making way too many decadent treats and not sharing some of my yummy foods that can save your waistline. 
This delicious Chia Seed Milk Tea is sooo easy, and it is a great way to give you energy, and curb your appetite, not to mention it tastes Awesome!
I love Bubble tea, that is a drink traditionally served with tapioca pearls and in Thai iced tea, coffee, or a fresh fruit smoothie. These typically have yogurt and lots of sugar! Tapioca pearls are not bad for you, but definitely do not have the health benefits of Chia seeds. This recipe will help you get that sweet craving satisfied as well as fill your stomach!


 You may be thinking... yuck, BUT this is seriously yummy...

Here are a few ways to use Chia seeds:
  •  Add chia seeds to your drinking water, milk, tea, coffee or any beverage that you have everyday. Make a wonderful smoothie or milkshake. After adding them to your drink, let the seeds soak for a while.
  • If you let the chia seeds soak for a longer time, say overnight, you will get a chia gel which you can store in an airtight container and eat later with a spoon. The gel will taste like your beverage. It is common way to eat chia seeds. Soak the seeds in water for about 10 minutes and see the seeds quickly absorb the water to turn into a gel and you can use this to make desserts.
  • Sprinkle chia on or into your food. Increase the nutritive value of any food by throwing in some Chia seeds. You can add the seeds to salads, soups, gravies, dips or sauces. Crumb your steaks and meats with Chia. Sprinkle them while you sauté your veggies or toss them in your rice. Chia seeds do not have an overpowering taste and you won’t even know they are in your food.
  • You can eat the seeds raw as they are; they are crunchy and will prevent you from snacking because they have a high fiber content .The seeds are available at any store selling whole grains and nutritive foods.
  • You can use the flour in baking, while making biscuits, cookies or cakes, bread or any bakery item. The seeds are gluten free and add crunch. They do not affect the texture of your bakes goods.

I found this awesome table showing some of the health benefits of chia seeds that I think will help you make the switch from putting them on pottery to watch grow (cha-cha-cha- chia!) and eatting them raw, gelled, and putting them in baked goods!
to learn more about chia seeds click on this link: http://bestchiaseeds.wegrc.com/
I found this photo from the link above!

Ok Have I convinced you to use chia seeds, I hope so!
 I was grossed out at first when my sister-in-law was eating spoon fulls of these to keep from snacking... but now I have done it! haha... (so much for judging too soon!)
These are flavorless, and easy to incorporate into almost anything,
  
This tea is commonly served as a drink at Indian Dinner Parties. 
It was a nifty way of filling up their guests before the meal so that they did not have to eat as much.
(Don't share this with your guests at the party.. they might feel jipped!) hah because this really works! 

Here is the recipe for the Raw-ish Chia Seed milk Tea! 
 
This is what you will need:
1 cup almond milk, 
3/4 cup stevia, 
8 cup tea steeped and cooled,
and 1/2 cup chia seeds


I use loose leaf tea and this is my favorite black tea! I use only 2 tbs for 6 cups of tea!
Start by steeping your tea with your 3/4 cup stevia and letting it cool for a while. 
Sun tea, Chai, or Green tea would all work! Use your favorite!

While the tea is cooling a bit lets get our almond milk in our pitcher and the chia seeds into the milk to soak for at least 10 minutes!
This is what the chia seeds look like before.. like little black poppy seeds.
and after they have soaked they should look gooey and like tapioca pearls with a black center.

make sure to mix the seeds around or they will stick together and you won't be able to drink them out of a normal straw...
add 2 cups crushed ice to the milk

Once your tea is drinkable temp filter your tea into the milk and chia seeds. 
I use a loose leaf tea bag to filter the tea in my pot but if you used tea bags just remove the bags, and poour into your milk!
 Make sure you have no tea leaves floating around in your pitcher.
Since you had the ice cubes in there you have a great iced tea!
 
 Stir your tea and chia seeds and serve in a full glass of ice!


 Make sure to not forget the straw and enjoy!
This tea will last over night.
Drink a cup to have energy, fullness and its less calories than a typical snack, sweet, not to mention all the health benefits!


Try at your next dinner when trying to watch your portions, make sure to grab some chia and sprinkle it in your drinks (even water) when you are craving that unhealthy snack, or just to help get your fiber and other nutrients that this wonder food has to offer!
Don't be shy, give it a try...
Enjoy!
Janelle Dutcher